想关闭本楼,强烈推荐Any Block 可以非常简单的实现分栏布局
1 个赞
新手请教一下如何用any block插件实现分栏?我查了一下,它是一个列表转表格的工具。
AnyBlock分栏的转换关键词是col,应该有下面几个:
- [col]:自动识别列表或标题
- [list2col]:转换列表分栏
- [title2col]:转换标题分栏
我是用的 [title2col] ,效果如下:
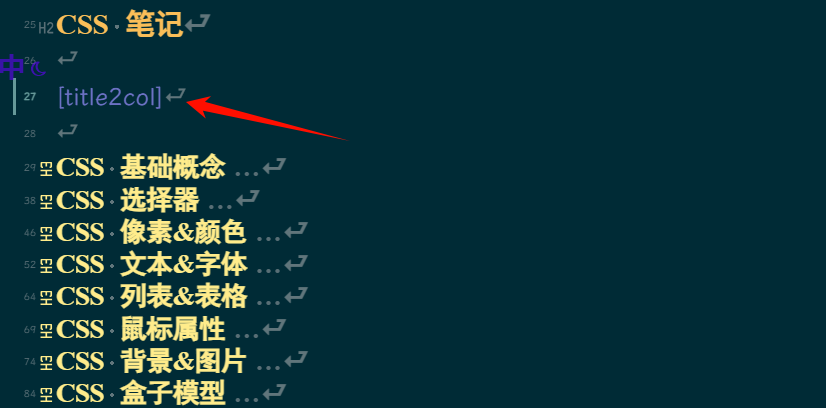
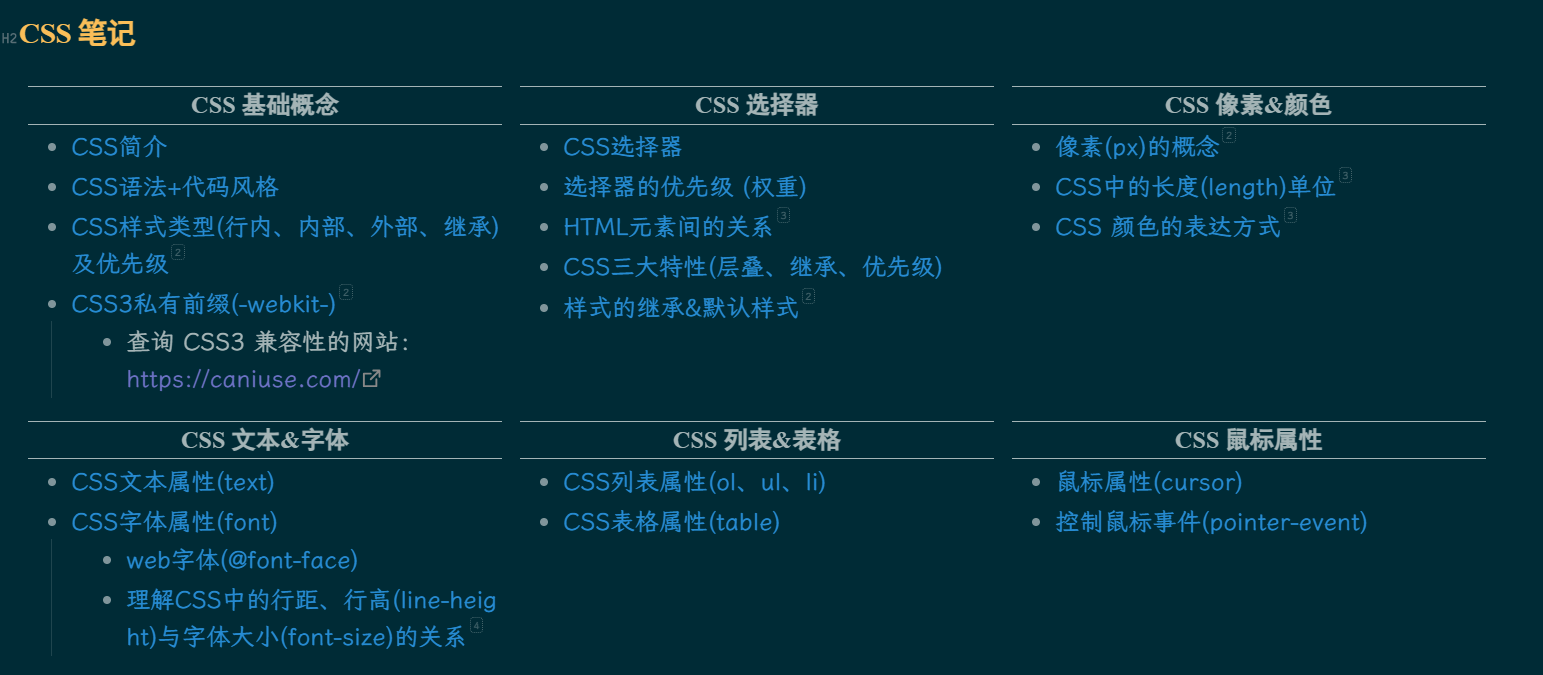
当然我这里改了下默认样式,正常显示的效果应该不一样。
2 个赞
为什么你的标题那么好看,用了什么 css 吗
改的样式
/* !title2col模式 */
[type_header="title2col"] {
  .ab-items.ab-col {
    display: grid;
    grid-template-columns: repeat(auto-fit, minmax(460px, 1fr));

    .ab-items-item {
      .ab-items-title {
        text-align: center;
        border-bottom: none !important;
        font-weight: bolder;
        font-family: 'Times New Roman', '黑体';

        p {
          border-top: 2px solid var(--text-normal);
          border-bottom: 2px solid var(--text-normal);
        }
      }
    }
  }
}
关于AnyBlock其他布局的样式
/* !标签页模式 */
.ab-tab-root.ab-tab-root.ab-tab-root {
  .ab-tab-nav {
    overflow: visible !important;
    text-overflow: none !important;

    .ab-tab-nav-item {
      background-color: transparent;

      overflow: visible !important;
      text-overflow: ellipsis !important;


      &[is_activate="true"] {
        color: var(--interactive-accent);
        border-bottom: 4px solid var(--interactive-accent);
      }

      &:hover {
        color: var(--interactive-accent);
      }
    }

  }

  .ab-tab-content {
    background-color: var(--background-primary);
    color: unset;
  }

}

.ab-line-yellow {
  text-decoration: none !important;
}

.ab-button.edit-block-button {
  display: none;
}


/* !list2card模式 */
.ab-items.ab-card.ab-card.ab-card.ab-card {
  display: grid !important;
  grid-template-columns: repeat(auto-fit, minmax(300px, 1fr)) !important;
  .ab-items-item {
    .ab-items-title {
      text-align: center;
      overflow: hidden;
      max-width: 100%;
      text-wrap: nowrap;
      text-overflow: ellipsis;
      border-bottom: none !important;
      color: var(--text-normal);
    }

    .ab-items-content {
      font-size: smaller;
    }

    p:has(span>img) {
      width: 100%;
      text-align: center;
    }

    img {
      object-fit: contain;
      max-width: 100%;
    }
  }
  div[class=".ab-items-item.placeholder"] {
    display: none;
  }
}

/* !title2col模式 */
[type_header="title2col"] {
  .ab-items.ab-col {
    display: grid;
    grid-template-columns: repeat(auto-fit, minmax(460px, 1fr));

    .ab-items-item {
      .ab-items-title {
        text-align: center;
        border-bottom: none !important;
        font-weight: bolder;
        font-family: 'Times New Roman', '黑体';

        p {
          border-top: 2px solid var(--text-normal);
          border-bottom: 2px solid var(--text-normal);
        }
      }
    }
  }
}
编辑模式可以支持吗?要怎么改呢?
不行,你可以试下AnyBlock,这个插件特别好用,强烈推荐
阿里嘎多,很有效果
你好,想请教您一下关于使用AB插件进行分栏的问题,对于长文本该如何实现分栏呢?
我有很多长篇笔记,内容为中英双语,我想把中文内容和英文内容分栏。
但由于网上实在找不到详细的AB插件教程,大多数都是些使用示例,我只会用AB分栏简单的内容。
请问你可以教教我吗?
发现之前写的有问题,这里改了一下,可以设置全局模式启动分栏的快捷命令,即不需要设置cssclasses,通过命令行临时切换。

/* @settings
name: 【分栏】分栏布局(Column-Page)
id: ColumnPage
settings:
  - id: column-page
    title: 分栏布局(Column-Page)
    type: class-toggle
    addCommand: true
  - id: column-page-width
    title: 分栏宽度
    description: 分栏最小宽度,单位为px
    type: variable-number
    default: 550
    format: px
  - id: column-page-type
    title: 默认分布模式
    type: class-select
    allowEmpty: false
    options:
      - value: column-h
        label: 横向模式,高度不变,不能跨列
      - value: column-v
        label: 纵向模式,宽度不变,可以跨列
    default: column-h
*/
/*! 分栏布局页面  by 熊猫 */
body {
  --column-page-width: 550px;
}

.column-v.column-page,
.column-page-v {
  & .markdown-preview-section {
    --file-line-width: 100% !important;

    & .snw-header-count-wrapper {
      right: unset;
    }

    display: block;
    column-gap: 2rem;
    column-width: var(--column-page-width) !important;
    column-rule: 2px dashed var(--background-modifier-border);
    column-fill: balance;
    /* 缩减底部空白 不然可能加载成空白页 */
    padding-bottom: 0px !important;
    min-height: unset !important;

    /* 字体大小和行内高度改变,你可以不改变,并删掉 */
    /* font-size: 18px !important;
    line-height: 160%; */

    /* 标题更紧凑一点 */
    & h2, h3, h4, h5, h6 {
      margin-top: 10px;
      margin-bottom: 5px;
      break-after: avoid;
    }

    & p {
      break-inside: avoid;
    }

    /* 选择不分列的元素,默认为h1,hr */
    & h1, hr {
      column-span: all;
    }

    /* 多列布局后,部分列表圆点会错位,这样可以避免 */
    & .list-bullet {
      position: absolute;
    }
  }

  &.column-h2 h2 {
    column-span: all;
  }
}

.column-page.column-h,
.column-page-h {
  & .markdown-preview-section {
    --file-line-width: 100% !important;

    & .snw-header-count-wrapper {
      right: unset;
    }

    column-gap: 2rem;
    column-width: var(--column-page-width) !important;
    column-rule: 2px dashed var(--background-modifier-border);
    column-fill: auto;
    height: 100%;
    /* 缩减底部空白 不然可能加载成空白页 */
    padding-bottom: 0px !important;
    min-height: unset !important;

    /* 字体大小和行内高度改变,你可以不改变,并删掉 */
    /* font-size: 18px !important; */
    /* line-height: 160%; */

    /* 标题更紧凑一点 */
    & h2, h3, h4, h5, h6 {
      margin-top: 10px;
      margin-bottom: 5px;
      break-after: avoid;
    }


    /* 多列布局后,部分列表圆点会错位,这样可以避免 */
    & .list-bullet {
      position: absolute;
    }
  }
}
2 个赞
推荐一个非常好用的水平滚动方案,通过Quicker实现。
设置全局水平分栏显示之后,一般需要通过按住键盘上的Shift键,鼠标滚轮才能实现鼠标滚轮,需要「鼠标+键盘」配合操作,有点麻烦。
然后在Quicker社区讨论中,找到了解决方案,即实现「按住鼠标右键+鼠标滚轮=>实现水平移动」,只需要一个鼠标就可以完成操作。
具体实现过程如下:
实现方法:Quicker动作+高级鼠标触发
高级鼠标触发设置:

参数配置:

两个设置,动作参数分别填 L 和 R
Quicker动作:
水平滚动 - by 紫cm煞 - 动作信息 - Quicker
设置后,在特定软件,按住右键滚动是水平滚动,不按右键滚动是上下滚动。
2 个赞