在Excalidraw中列出某笔记所有二级Heading

完成的功能

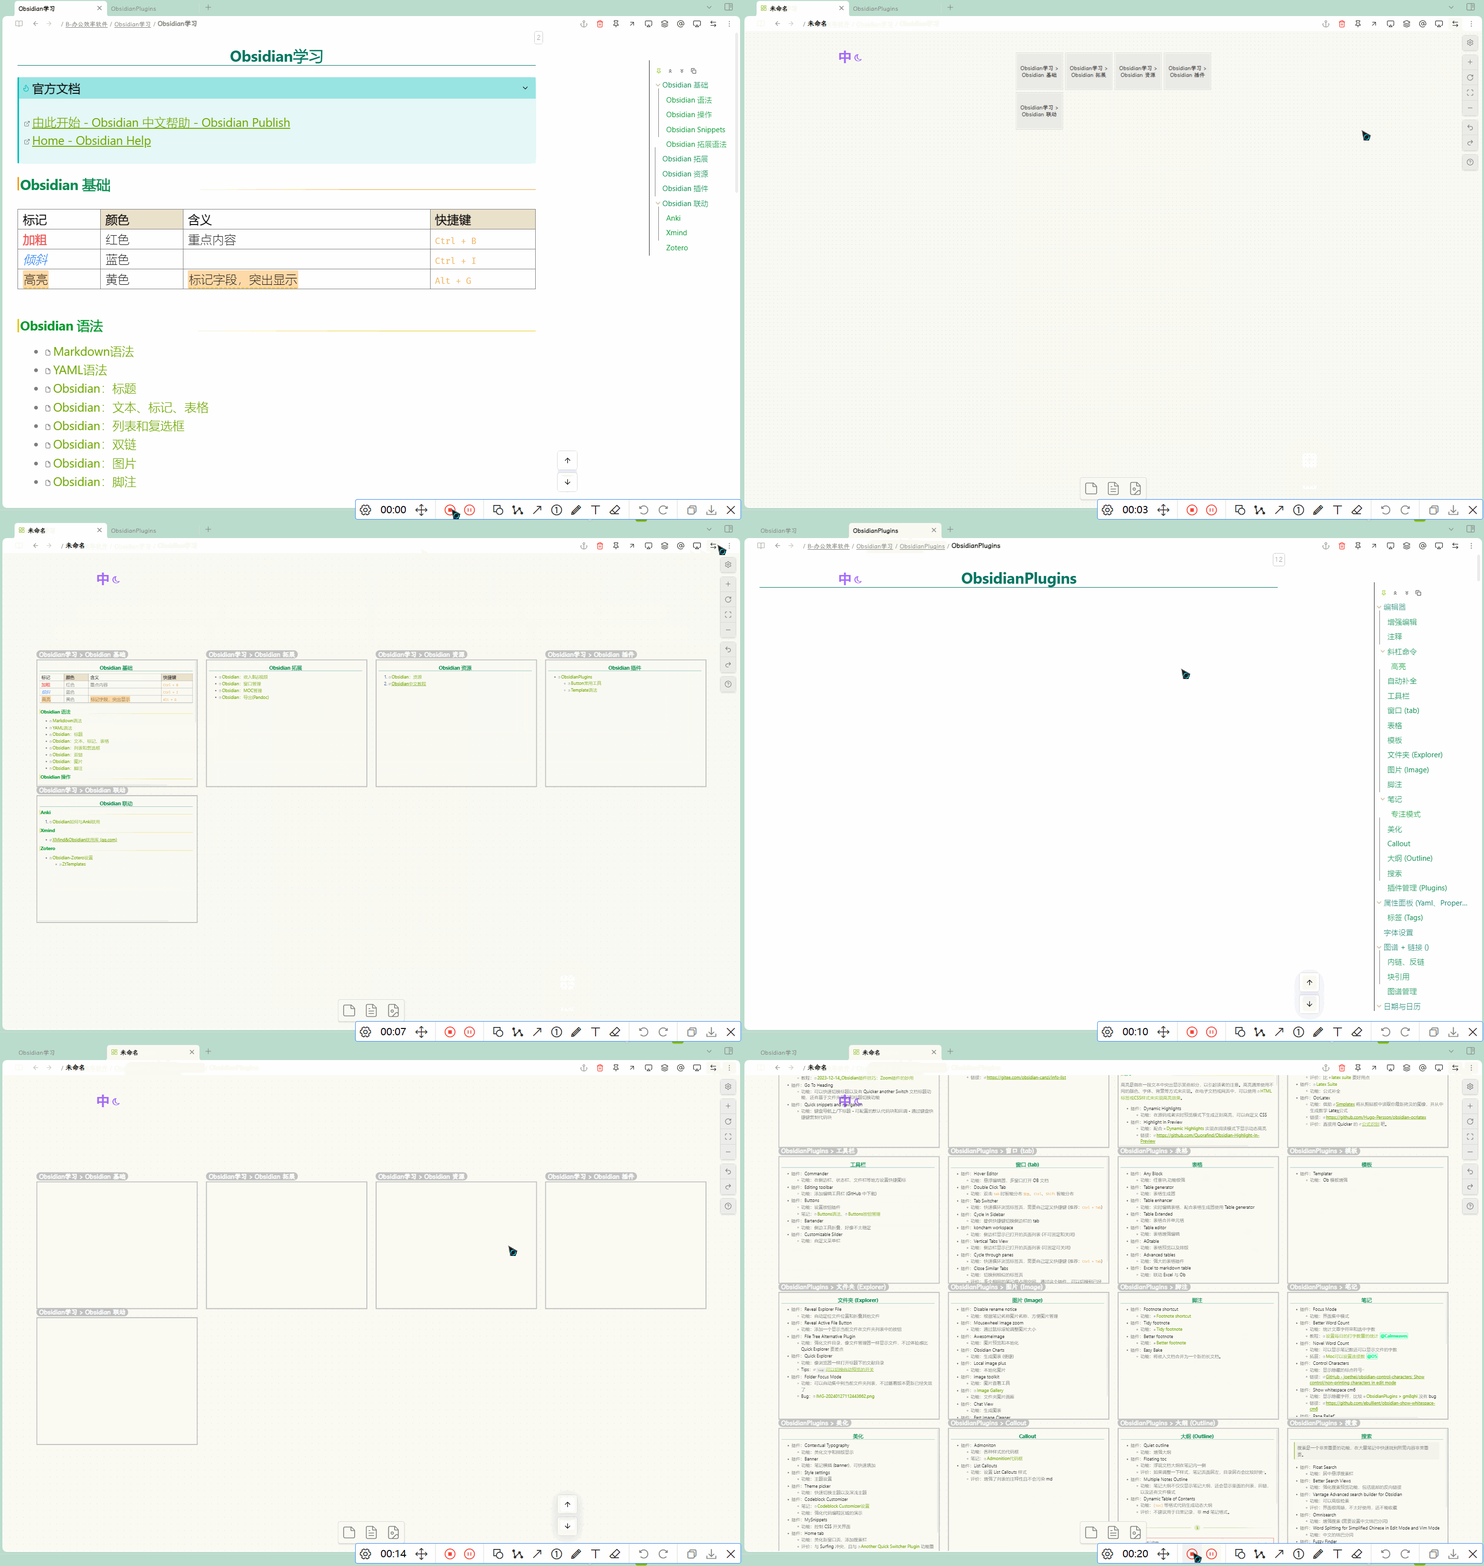
根据一个markdown笔记,在excalidraw笔记文件夹生成一个以原笔记名称+“.excalidraw.md"为文件名的excalidraw画布并在该画布中以iframe的形式列出笔记中所有二级标题”## “及包含的内容,生成的frame格式固定但可修改。
若markdown所在笔记文件夹有以(原笔记名称+”.excalidraw.md")为文件名的文件,则新文件名为(原笔记名称+“.excalidraw1.md”);
若excalidraw笔记文件夹有以(原笔记名称+“.excalidraw.md”)为文件名的文件,则新文件名为(原笔记名称+“.excalidraw2.md”)。
平铺方式为尽可能以开方数平铺,即以目标Heading总数的开方数向下取整为行数,从上到下、从左向右地平铺。

  • e.g. 9个目标Heading数,则为3行x3列平铺
  • e.g. 12个目标Heading数,则为3行x4列平铺
  • 但当如15个目标Heading数,则为3行x5列平铺,没有很好的以正方平铺,待优化
  • e.g. 16个目标Heading数,则为4行x4列平铺
  • e.g. 17个目标Heading数,则为4行x5列平铺,第5列为1个frame

功能预览

配置文件下载

链接: 百度网盘 请输入提取码 提取码: f7wy

Obsidian Excalidraw源码文件组成

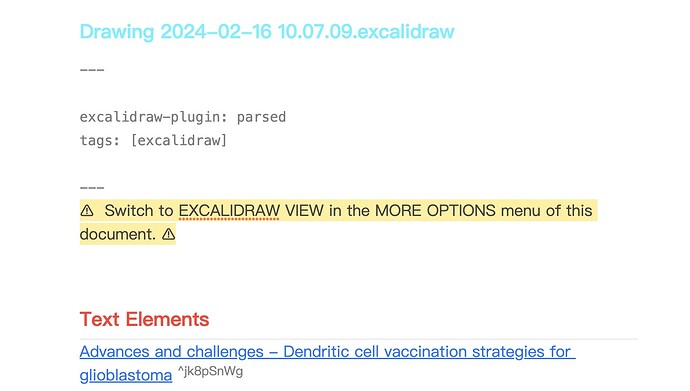
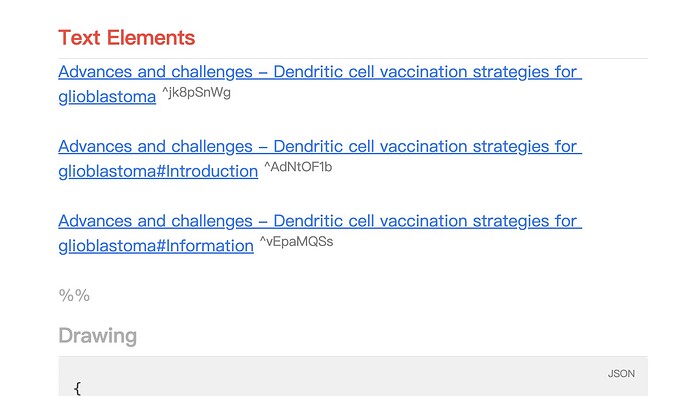
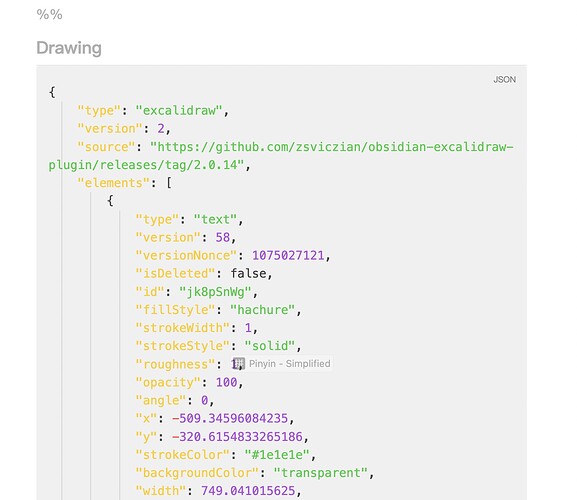
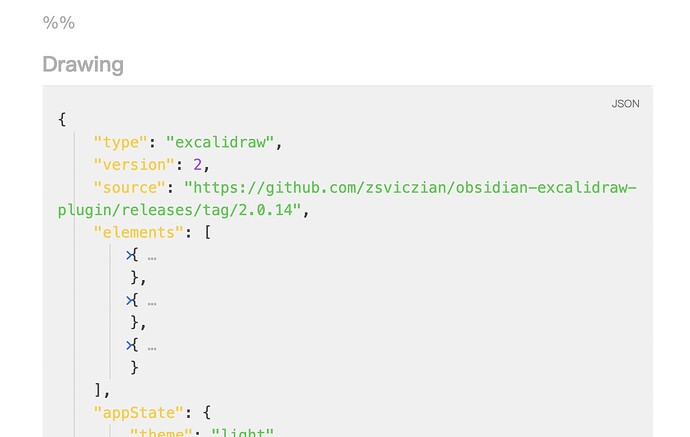
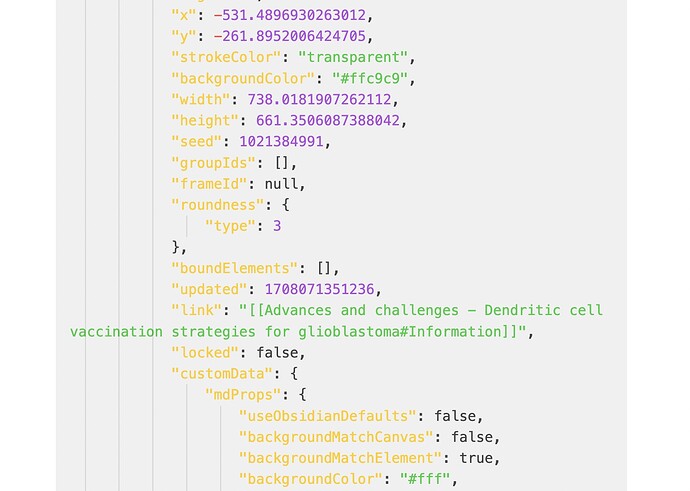
首先观察Excalidraw画布的markdown源码文件组成
主要为3部分组成:声明部分、文字元素部分和绘画参数部分


再仔细观察文字元素部分和绘画参数部分发现,增添框的本质就是 文字元素部分中 双链的增减 和 绘画参数中 元素的增减和双链修改。当然还有用来指明位置的x、y轴修改,不然就重叠在一起了。
另外还有不用在意的frame seed随机数和修改时间的时间戳的改变,但seed会自己随机生成,时间戳则在脚本中生成了,所以不要在意。


需准备的:

  • Plugin Required:
    • Excalidraw 插件商店版2.0.14
    • Templater 插件商店版2.0.0
  • 需要三个文件夹:
    • “…/Templates/” : 用来放templater模板文件
    • “…/Scripts/” : 用来放js脚本文件
    • “…/Excalidraw/” :用来放Excalidraw笔记文件,插件会自带,也可自定义
  • 需要的文件:
    • 必需文件:
      • 模板文件CreateNewFileAndListAllHeading2s.md:
        • 作用:用来templater运行模板
        • 放置位置:放置于“…/Templates/” 文件夹下
      • 脚本文件:
        • List_All_Heading2s_in_New_File.js
          • 作用:用来生成Excalidraw的md源码中“%%# Drawing%%”部分中的element部分
          • 放置位置:放置于“…/Scripts/” 文件夹下
        • List_All_Heading2_elements_in_New_File.js
          • 作用:用来生成Excalidraw的md源码中“# Text Elements”的部分
          • 放置位置:放置于“…/Scripts/” 文件夹下
    • 测试用:
      • 测试用md文件:包含多个二级Heading用来测试
        • 此处用"test.md"
  • 需配置的插件选项
    • Excalidraw-basis-配置Excalidraw新绘图所在的文件夹
    • Templater-Template folder location-配置模板所存放的文件夹
  • 需配置的脚本文件
    • 配置模板文件“CreateNewFileAndListAllHeading2s.md”
      • 打开“CreateNewFileAndListAllHeading2s.md”
      • 修改Excalidraw文件夹路径:
        • 找到“tp.file.exists(“/Extras/Excalidraw/ExcalidrawNotes/” + newFilenameNote + “.md”);” 和 “await tp.file.move(“/Extras/Excalidraw/ExcalidrawNotes/” + newFilenameExcalidraw);”
        • 将英文引号中的/Extras/Excalidraw/ExcalidrawNotes/换成你所配置的Excalidraw文件夹相对路径
        • 注意英文输入、注意英文大小写、注意前后斜杠符"/"
  • 可选:
    • QuickAdd

运行过程

  1. 打开test.md文件,并点击文件任意处以放置光标,确保该文件处于编辑状态
  2. Cmd或Ctrl+P打开命令面板输入以选择"Templater: Open Insert Template Modal"
  3. 选择CreateNewFileAndListAllHeading2s以运行脚本
  4. 切换成Excalidraw:
    • Cmd或Ctrl+P打开命令面板输入以选择“在Excalidraw和Markdown模式之间切换”
    • 点右上角“…”选择“打开为Excalidraw绘图”
      test文件预览
      运行过程

可调整的选项

  • 以下仅在“List_All_Heading2_elements_in_New_File.js”文件中修改
    • 用文本编辑器打开文件
    • cmd或ctrl+F搜索对应配置名称
    • 修改冒号后的内容,注意不要删除英文逗号,有英文引号的不要删除英文引号
    • 可修改的配置
      • Excalidraw iframe框的格式
        • !!!格式注意!!!
          • 选项中有"“的都需要加英文引号”
          • ""中的英文均为小写
        • “fillStyle”: - 背景网格 - 默认"solid"
          • “hachure” - 斜线
          • “cross-hatch” - 网格
          • “solid” - 干净无网格 - 默认
        • “strokeWidth”: - 框线粗细 - 只有4个选项
          • 0.5
          • 1
          • 2
          • 4
        • “strokeStyle”:
          • “solid”
          • “dashed”
          • “dotted”
        • “roughness”: - 边框棱角 - 注意!!!不是【“roughness”:{“type”: }】
          • 0 - 边框圆角
          • null - 边框直角 - 不用加引号!
        • “opacity”: - 边框线透明度
          • 0-100
            • 数字0-100对应0%-100%自己选
            • 默认100
            • 后面不要加百分号%!!!
        • “angle”: - 旋转角度
          • 0-6.28
            • 弧度制
              • 1.57位顺时针90度
              • 3.14为顺时针180度
              • 4.71为顺时针270度
            • 以此类推
            • 默认为0
        • “strokeColor”: 边框线颜色
          • 使用16进制颜色格式
          • 根据在线选色网站自己挑选
          • 也可以转换为excalidraw后自己选色
          • 注意加英文引号""
          • #1e1e1e” - 默认黑色
        • “backgroundColor”: - 背景颜色
          • 取值及格式同"strokeColor"
          • “transparent” - 默认无颜色=透明
        • “width”:
          • 宽度,自己根据需要选
          • 779.27272827 = 8*π^2*π^2 - 作者瞎挑的,不必一样
        • “height”:
          • 高度,自己根据需要选
          • 789.56835209 = 80*π^2 - 主要是选了个类正方形的宽高比π^2/10
        • “roundness”: {“type”: 3} - 边框圆角类型
          • 试了一下
            • 3为半圆角
            • 1或2为大圆角
            • 0或其他数值为直角
        • “useObsidianDefaults”: - 嵌入的被引用的md笔记 是否用obsidian主题默认设定
          • false或true - 默认false,false才能改以下选项
        • “backgroundMatchCanvas”: - 嵌入的被引用的md笔记 的背景颜色是否直接使用画布颜色
          • false或true - 默认false
          • 注意"backgroundMatchCanvas"和"backgroundMatchElement"的布尔值相互冲突,只能有一个false一个true
          • 若"backgroundMatchCanvas"取值为false,则"backgroundMatchElement"取值为true
          • 注意取值为布尔值,不需要英文引号""
        • “backgroundMatchElement”: - 嵌入的被引用的md笔记 的背景颜色是否直接使用frame的背景颜色
          • true或false - 默认true
          • 注意"backgroundMatchCanvas"和"backgroundMatchElement"的布尔值相互冲突,只能有一个false一个true
          • 若"backgroundMatchCanvas"取值为false,则"backgroundMatchElement"取值为true
          • 注意取值为布尔值,不需要英文引号""
        • “backgroundColor”: - 嵌入的被引用的md笔记 的背景颜色
          • 取值及格式同"strokeColor"
        • “backgroundOpacity”: - 嵌入的被引用的md笔记 的背景颜透明度
          • 0-100
            • 数字0-100对应0%-100%自己选
            • 后面不要加百分号%!!!
          • 默认60
        • “borderMatchElement”: - 嵌入的被引用的md笔记 的边界的颜色是否直接使用frame的背景颜色
          • true或false - 默认true
          • 只有false才能改"borderColor"和"borderOpacity"
          • 不是边框线哦,注意区别,若辨别不出来,改个不同的颜色看一下就知道了
        • “borderColor”: - 嵌入的被引用的md笔记 的边界的颜色
          • 取值及格式同"strokeColor"
        • “borderOpacity”: - 嵌入的被引用的md笔记 的边界的透明度
          • 0-100
            • 数字0-100对应0%-100%自己选
            • 后面不要加百分号%!!!
          • 默认0
        • “filenameVisible”: - 是否显示 嵌入的被引用的md笔记 的Heading
          • true或false
          • 默认false
          • 但建议改成true,可以知道小笔记的题目
  • 可修改匹配的Heading层级:在两个js文件中均需修改
    • 用文本编辑器打开两个脚本文件
    • 找到“const regex = /^##\s+(.+)\n/gm;”
    • 将正则表达式中的两个井号“##”改成对应层级的#数量
      • 如果你会正则表达式,可以改成匹配所有不同层级的Heading,但没必要——毕竟上级Heading内容包括下级Heading内容

缺陷

  • 生成后若有非iframe形式的笔记形式插入,在重新打开后第一个iframe的引用会有bug
    • 以作者的代码萌新的实力暂时无法解决
  • 平铺方式并没有尽可能以开方数平铺
    • 可重构代码解决,但没时间和精力再去搞了
    • 主打一个能用就行
2 个赞

感谢分享,可以研究研究

想问一个问题,直接用Canvas来平铺标题会不会好点,Canvas就是Json而已,编辑方面可能更方便点

canvas用的比较少,主要中的是还是excalidraw,我的印象还停留在canvas不能插入heading中。
我这个需求出现情景是,我想把文献笔记用图形尖头表现出各种逻辑关系,在放置尖头之前,需要先把Heading都列出来才行,所以就现学写了个脚本

哦哦 现在canvas是可以显示head的

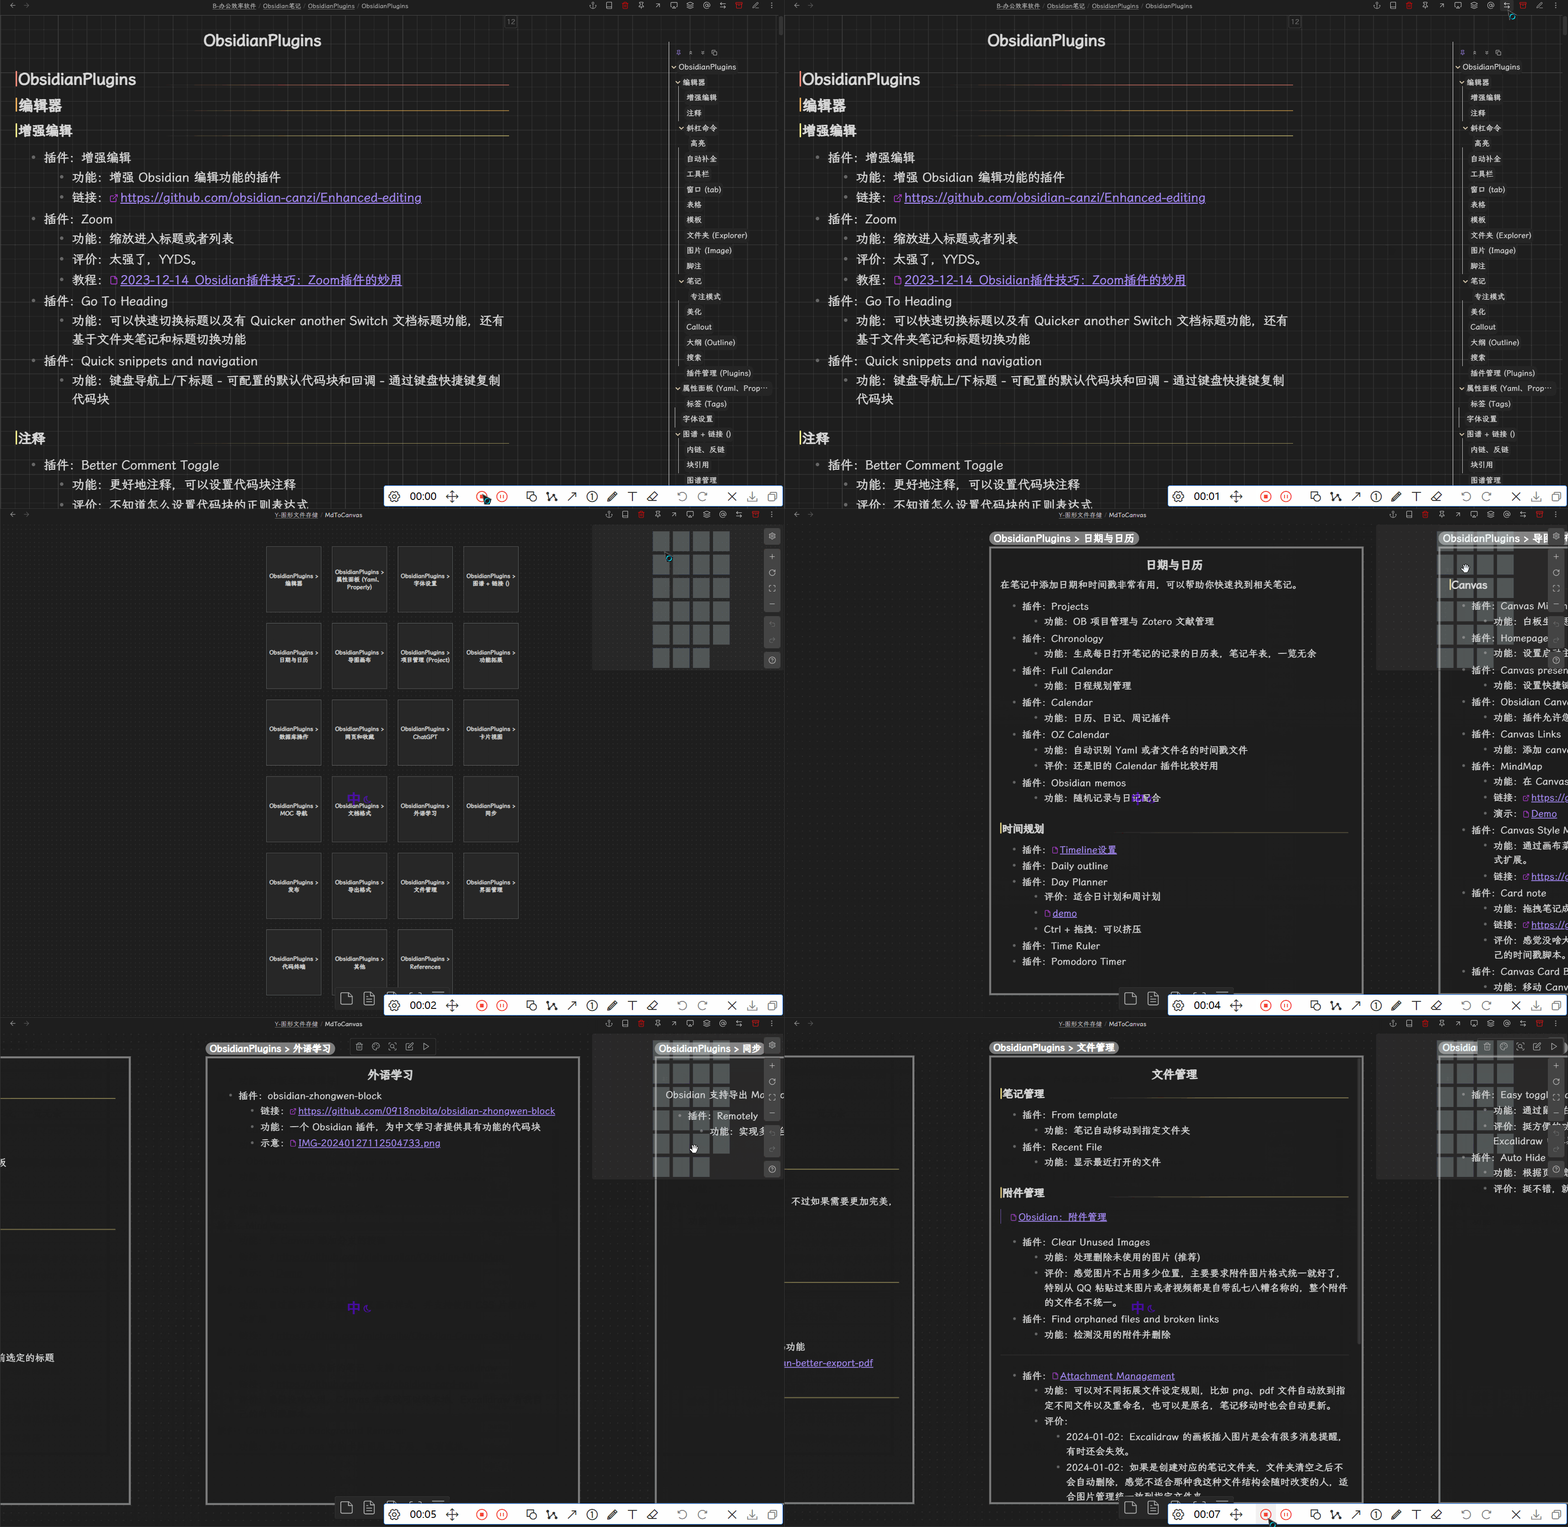
我按照canvas写了一下,这是效果演示
PixPin_2024-02-22_21-47-30
是固定一个Canvas用来编辑,我这边直接随便设置的一个未命名.canvas
可以2种模式可以相互转换,不过还没有设置参数调节表单,目前参数只能通过代码参数来调节,打算用配合ModalForm来设置。

参数表

// 大纲等级
const level = 2;
// 卡片参数
const width = 960;
const height = 760;
// 卡片间隔
const space = 50;
// 每行卡片的数量限制
const limit = 4;
// 基于库的相对路径的Canvas
const canvasPath = "未命名.canvas"; 
Quickadd的Macro的代码
const path = require('path');
const fs = require('fs');
module.exports = async () => {
    // 获取笔记的基本路径
    const file = app.workspace.getActiveFile();
    const fileFullPath = app.vault.adapter.getFullPath(file.path);

    // 大纲等级
    const level = 2;
    // 卡片参数
    const width = 960;
    const height = 760;
    // 卡片间隔
    const space = 50;
    // 每行卡片的数量限制
    const limit = 4;
    // 基于库的相对路径的Canvas
    const canvasPath = "未命名.canvas";

    const canvasData = {
        nodes: [],
        edges: []
    };
    if (file.extension === 'md') {
        console.log("开始获取二级标题");
        const heads = getHeadings(fileFullPath, level);
        console.log(heads);

        let x = 0;
        let y = 0;
        let n = 1;
        let nodes = [];
        const length = heads.length;

        for (let i = 1; i <= length; i++) {
            const node = {
                id: "",
                type: "file",
                file: file.path,
                subpath: "",
                x: 0,
                y: 0,
                width: width,
                height: height,
            };

            node.subpath = heads[i - 1];
            node.id = i;
            node.x = x;
            node.y = y;
            console.log([heads[i - 1], x, y]);

            x += width + space;
            if (i >= limit * n) {
                y += height + space;
                x = 0;
                n = n + 1;
            }
            console.log([heads[i - 1], node.x, y]);

            nodes.push(node);
        }
        canvasData.nodes = nodes;
        console.log(canvasData);
        const canvasFile = app.vault.getAbstractFileByPath(canvasPath);
        const canvasJson = JSON.stringify(canvasData, null, 2);
        if (canvasFile) {
            app.vault.modify(canvasFile, canvasJson);
        } else {
            file = await app.vault.create(canvasPath, canvasJson);
            canvasFile = app.vault.getAbstractFileByPath(canvasPath);
        }
        app.workspace.activeLeaf.openFile(canvasFile);

    } else if (file.extension === 'canvas') {
        fs.readFile(fileFullPath, 'utf8', (err, data) => {
            if (err) throw err;
            const canvasData = JSON.parse(data);
            // 获取nodes中的object.file
            canvasData.nodes;
            const mdFilePath = canvasData.nodes[0].file;
            app.workspace.activeLeaf.openFile(app.vault.getAbstractFileByPath(mdFilePath));
        });

    }

};


function getHeadings(fileFullPath, level) {
    // 读取文件内容
    const fileContent = fs.readFileSync(fileFullPath, 'utf-8');

    // 使用正则表达式提取指定级别的标题
    const regex = new RegExp(`^#{2,${level}}\\s(.+)`, 'gm');
    const matches = [];
    let match;

    while ((match = regex.exec(fileContent)) !== null) {
        matches.push("#" + match[1]);
    }
    return matches;
}
1 个赞

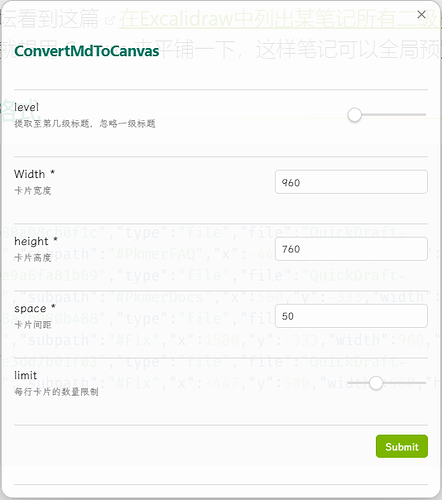
配合ModalForm插件写了个表单,可以设置参数了,不过体验下来,还不如提前把参数设置好

需要安装ModalForm插件,脚本如下:

// 基于库的相对路径的Canvas
const canvasPath = "未命名.canvas";

const path = require('path');
const fs = require('fs');
const modalForm = app.plugins.plugins.modalforms.api;
// 获取笔记的基本路径
const file = app.workspace.getActiveFile();
const fileFullPath = app.vault.adapter.getFullPath(file.path);


module.exports = async () => {

    const editorForm1 = {
        "title": "ConvertMdToCanvas",
        "name": "ConvertMdToCanvas",
        "fields": [
            {
                "name": "level",
                "label": "level",
                "description": "提取至第几级标题,忽略一级标题",
                "input": {
                    "type": "slider",
                    "min": 2,
                    "max": 6
                }
            },
            {
                "name": "width",
                "label": "Width",
                "description": "卡片宽度",
                "isRequired": true,
                "input": {
                    "type": "number"
                }
            },
            {
                "name": "height",
                "label": "height",
                "description": "卡片高度",
                "isRequired": true,
                "input": {
                    "type": "number"
                }
            },
            {
                "name": "space",
                "label": "space",
                "description": "卡片间距",
                "isRequired": true,
                "input": {
                    "type": "number"
                }
            },
            {
                "name": "limit",
                "label": "limit",
                "description": "每行卡片的数量限制",
                "input": {
                    "type": "slider",
                    "min": 1,
                    "max": 10
                }
            },
        ]
    };
    const canvasData = {
        nodes: [],
        edges: []
    };
    if (file.extension === 'md') {
        // 设定默认值
        let result = await modalForm.openForm(
            editorForm1,
            {
                values: {
                    level: 2,
                    width: 960,
                    height: 760,
                    limit: 4,
                    space: 50,
                }
            }
        );


        // 大纲等级
        const level = result.getValue('level').value;
        // 卡片参数
        const width = result.getValue('width').value;
        const height = result.getValue('height').value;
        // 卡片间隔
        const space = result.getValue('space').value;
        // 每行卡片的数量限制
        const limit = result.getValue('limit').value;

        console.log("开始获取二级标题");
        const heads = getHeadings(fileFullPath, level);
        console.log(heads);

        let x = 0;
        let y = 0;
        let n = 1;
        let nodes = [];
        const length = heads.length;

        for (let i = 1; i <= length; i++) {
            const node = {
                id: "",
                type: "file",
                file: file.path,
                subpath: "",
                x: 0,
                y: 0,
                width: width,
                height: height,
            };

            node.subpath = heads[i - 1];
            node.id = i;
            node.x = x;
            node.y = y;
            console.log([heads[i - 1], x, y]);

            x += width + space;
            if (i >= limit * n) {
                y += height + space;
                x = 0;
                n = n + 1;
            }
            console.log([heads[i - 1], node.x, y]);

            nodes.push(node);
        }
        canvasData.nodes = nodes;
        console.log(canvasData);
        const canvasFile = app.vault.getAbstractFileByPath(canvasPath);
        const canvasJson = JSON.stringify(canvasData, null, 2);
        if (canvasFile) {
            app.vault.modify(canvasFile, canvasJson);
        } else {
            file = await app.vault.create(canvasPath, canvasJson);
            canvasFile = app.vault.getAbstractFileByPath(canvasPath);
        }
        app.workspace.activeLeaf.openFile(canvasFile);

    } else if (file.extension === 'canvas') {
        fs.readFile(fileFullPath, 'utf8', (err, data) => {
            if (err) throw err;
            const canvasData = JSON.parse(data);
            // 获取nodes中的object.file
            canvasData.nodes;
            const mdFilePath = canvasData.nodes[0].file;
            app.workspace.activeLeaf.openFile(app.vault.getAbstractFileByPath(mdFilePath));
        });

    }


};

function getHeadings(fileFullPath, level) {
    // 读取文件内容
    const fileContent = fs.readFileSync(fileFullPath, 'utf-8');

    // 使用正则表达式提取指定级别的标题
    const regex = new RegExp(`^#{2,${level}}\\s(.+)`, 'gm');
    const matches = [];
    let match;

    while ((match = regex.exec(fileContent)) !== null) {
        matches.push("#" + match[1]);
    }
    return matches;
}

是的,我修改之前的代码,弄错的,谢谢提醒啦,
我修改为:
file = await app.vault.create(canvasPath, canvasJson);
canvasFile = app.vault.getAbstractFileByPath(canvasPath);

如果不存在,第一次Quickadd会报错,第二次就好了

1 个赞

我拿 QuickAdd Capture 测试,应该 canvasFile = await app.vault.create(canvasPath, canvasJson) 就不会报错而是直接创建了。

基本配置参 QuickAdd JS & Templater JS 简介及相互修改“QuickAdd Capture 加载内部代码”。

js quickadd 代码,点击展开
const getFBP = path=> app.vault.getAbstractFileByPath(path), getFC = file=> app.metadataCache.getFileCache(file)
, file = app.workspace.getActiveFile(), cvsData = { nodes: [], edges: [] }
, lv = 2, width = 400, height = 400, space = 20, limit = 4, cvsPath = '未命名.canvas' // 参数行
switch (file.extension) {
case 'md': let heads = getFC(file).headings?.filter(p=> p.level <= lv).map(p=> `#${p.heading}`)
if (!heads) return; let x = 0, y = 0, n = 1, nodes = []
  for (let i = 1; i <= heads.length; i++) {
    let node = { id: '', type: 'file', file: file.path, subpath: '', x: 0, y: 0, width: width, height: height }
    node.subpath = heads[i-1]; node.id = String(i); node.x = x; node.y = y; x += width + space
    if (i >= limit * n) { y += height + space; x = 0; n += 1 }; nodes.push(node)
  }; cvsData.nodes = nodes; let cvsFile = getFBP(cvsPath), cvsJson = JSON.stringify(cvsData, null, 2)
  if (cvsFile) { app.vault.modify(cvsFile, cvsJson) } else cvsFile = await app.vault.create(cvsPath, cvsJson)
  app.workspace.activeLeaf.openFile(cvsFile); break
case 'canvas': app.workspace.activeLeaf.openFile(getFBP(JSON.parse(await app.vault.read(file)).nodes[0].file)); break
}

感谢分享 :hand_with_index_finger_and_thumb_crossed: 比心

更新:js quickadd 版本代码已和 #13 同步。

1 个赞

测试成功,感谢感谢

继续发一下,之前生成的canvas的id是数字,正常的应该是字符串,这里重新发下代码,另外发现 Obsidian-canvas-minimap (github.com)这个插件特别好用,可以生成缩略图并点击跳转:

PixPin_2024-03-04_17-23-28

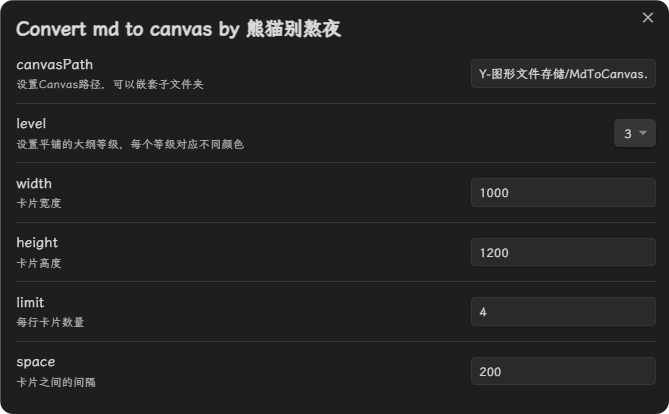
另外我设置了参数在QuickAdd里面,不同等级的标题的卡片颜色会变化:
image

QuickAdd Macro脚本
const path = require('path');
const fs = require('fs');
// 获取笔记的基本路径
const file = app.workspace.getActiveFile();
const fileFullPath = app.vault.adapter.getFullPath(file.path);

module.exports = {
    entry: async (QuickAdd, settings, params) => {
        // 可调节的参数
        // 大纲等级
        const level = Number(settings["level"]);
        // 卡片参数
        const width = Number(settings["width"]);
        const height = Number(settings["height"]);
        // 卡片间隔
        const space = Number(settings["space"]);
        // 每行卡片的数量限制
        const limit = Number(settings["limit"]);
        // 基于库的相对路径的Canvas
        const canvasPath = settings["canvasPath"];

        const canvasData = {
            nodes: [],
            edges: []
        };
        if (file.extension === 'md') {
            console.log("开始获取二级标题");
            const { heads, counts } = getHeadings(fileFullPath, level);
            console.log(heads);

            let x = 0;
            let y = 0;
            let n = 1;
            let nodes = [];
            const length = heads.length;

            for (let i = 1; i <= length; i++) {
                const node = {
                    id: "",
                    type: "file",
                    file: file.path,
                    subpath: "",
                    x: 0,
                    y: 0,
                    width: width,
                    height: height,
                };

                node.subpath = heads[i - 1];
                node.id = String(i);
                node.x = x;
                node.y = y;
                node.color = String(counts[i - 1]-1)
                console.log([heads[i - 1], x, y]);

                x += width + space;
                if (i >= limit * n) {
                    y += height + space;
                    x = 0;
                    n = n + 1;
                }
                console.log([heads[i - 1], node.x, y]);

                nodes.push(node);
            }
            canvasData.nodes = nodes;
            console.log(canvasData);
            const canvasFile = app.vault.getAbstractFileByPath(canvasPath);
            const canvasJson = JSON.stringify(canvasData, null, 2);
            if (canvasFile) {
                app.vault.modify(canvasFile, canvasJson);
                app.workspace.activeLeaf.openFile(canvasFile);
            } else {
                canvasFile = app.vault.create(canvasPath, canvasJson);
                app.workspace.activeLeaf.openFile(canvasFile);
            }

            // 尝试重新加载缩略图
            setTimeout(() => {
                try {
                    app.commands.executeCommandById("canvas-minimap:reload");
                } catch (error) {
                    console.log(error);
                }
            }, 1000);


        } else if (file.extension === 'canvas') {
            fs.readFile(fileFullPath, 'utf8', (err, data) => {
                if (err) throw err;
                const canvasData = JSON.parse(data);
                // 获取nodes中的object.file
                canvasData.nodes;
                const mdFilePath = canvasData.nodes[0].file;
                app.workspace.activeLeaf.openFile(app.vault.getAbstractFileByPath(mdFilePath));
            });

        }

    },
    settings: {
        name: "Convert md to canvas",
        author: "熊猫别熬夜",
        options: {
            "canvasPath": {
                type: "text",
                defaultValue: "MdToCanvas.canvas",
                placeholder: "相对路径",
                description: "设置Canvas路径,可以嵌套子文件夹",
            },
            "level": {
                type: "dropdown",
                defaultValue: 2,
                options: [2, 3, 4, 5, 6],
                description: "设置平铺的大纲等级,每个等级对应不同颜色",
            },
            "width": {
                type: "text",
                defaultValue: "1080",
                placeholder: "卡片参数",
                description: "卡片宽度",

            },
            "height": {
                type: "text",
                defaultValue: "1000",
                placeholder: "卡片参数",
                description: "卡片高度",
            },

            "limit": {
                type: "text",
                defaultValue: "3",
                placeholder: "每行卡片数量",
                description: "每行卡片数量",
            },
            "space": {
                type: "text",
                defaultValue: "250",
                placeholder: "卡片间隔",
                description: "卡片之间的间隔",

            },
        }
    }

};


function getHeadings(fileFullPath, level) {
    // 读取文件内容
    const fileContent = fs.readFileSync(fileFullPath, 'utf-8');
    // 使用正则表达式提取指定级别的标题
    const regex = new RegExp(`^#{2,${level}}\\s(.+)`, 'gm');
    const heads = [];
    let head;
    let counts = [];

    while ((head = regex.exec(fileContent)) !== null) {
        heads.push("#" + head[1]);
        counts.push(head[0].match(/#/g).length);
    }
    return { heads, counts };
}

1 个赞

超级好用,谢谢大佬!关于笔记生成canvas的思维导图的方向,大佬有兴趣做个插件吗~

我也想,目前没那个能力 :joy:

获取笔记中的标题的话,可以用 app.metadataCache.getFileCache(TFile).headings
比正则能稳健一点

1 个赞